To create and publish your first test in ExamJet, you need to follow some steps:
- First, you need to create a question bank and add questions to it
- Then, you should have prepared a list of students who will be allowed to take the test
- Based on the information above, you can create a test
So, open Manager, and let’s do it step-by-step.
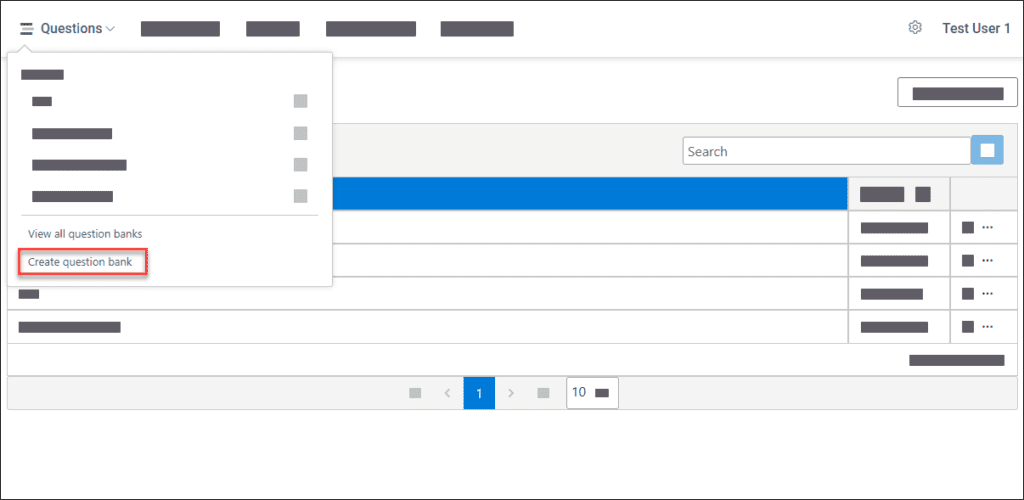
Create a question bank #
You will find Questions on the main menu, click on it, and then select “Create question bank”.
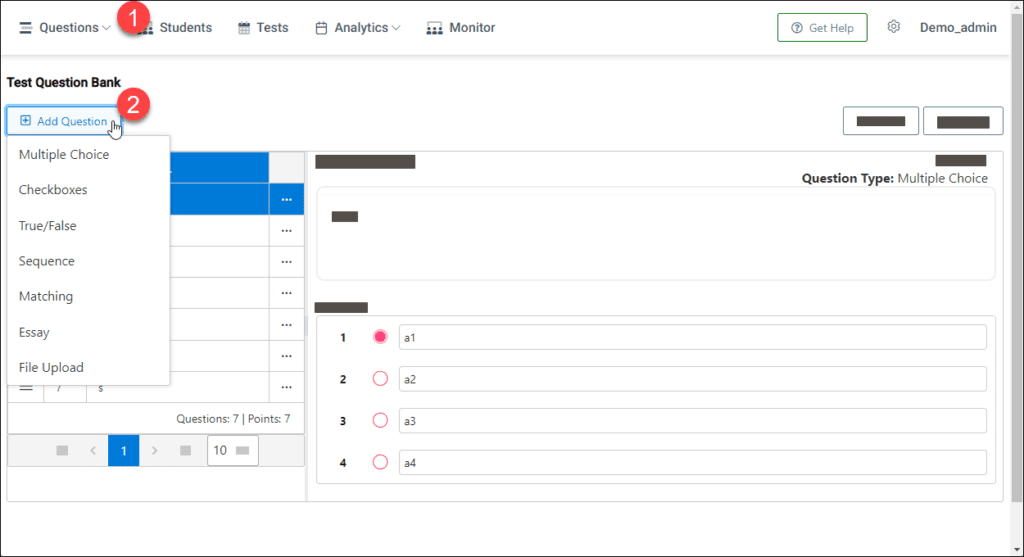
Add questions #
Now you can add actual questions in that question bank.
Click on the Add Question button and you will see question-type options.
Choose the desired one.
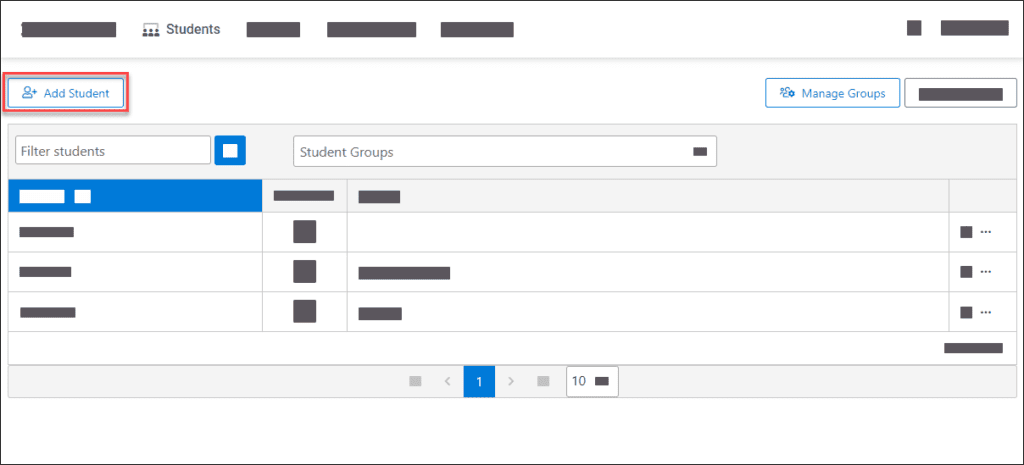
Add students #
On the main menu find Students and click on it.
Click on the Add Student button and add a couple of them
Add students into groups #
Students should be located in one or more groups to allow them to take the test.
Click on Manage Groups and then add the group itself.
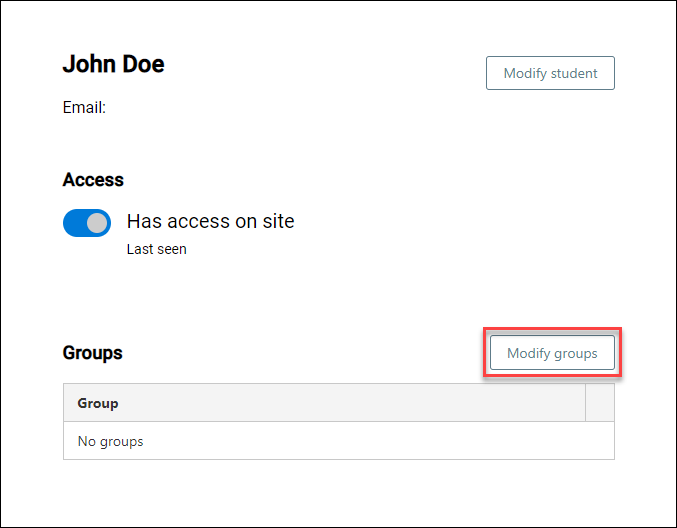
After creating the group, go back to the students’ list and select the student by clicking the Student Details icon.
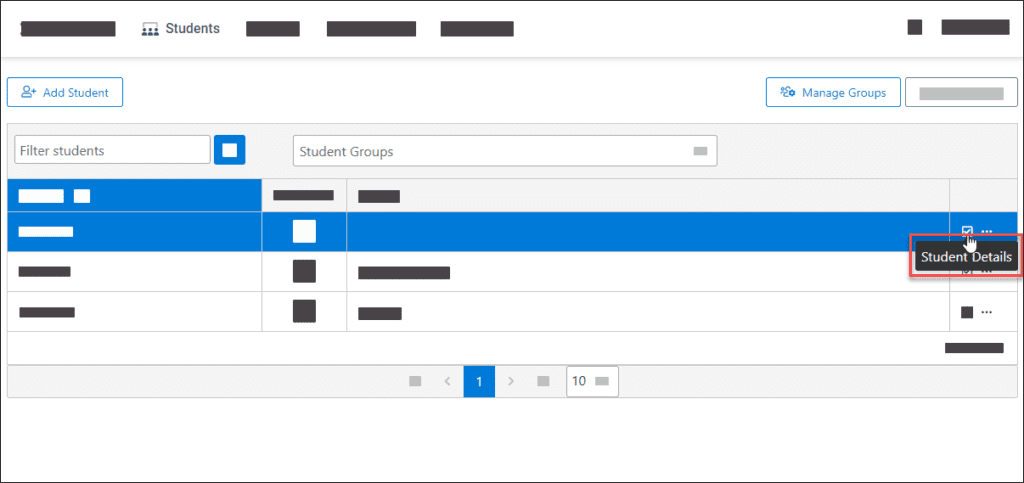
You will see details about the student.
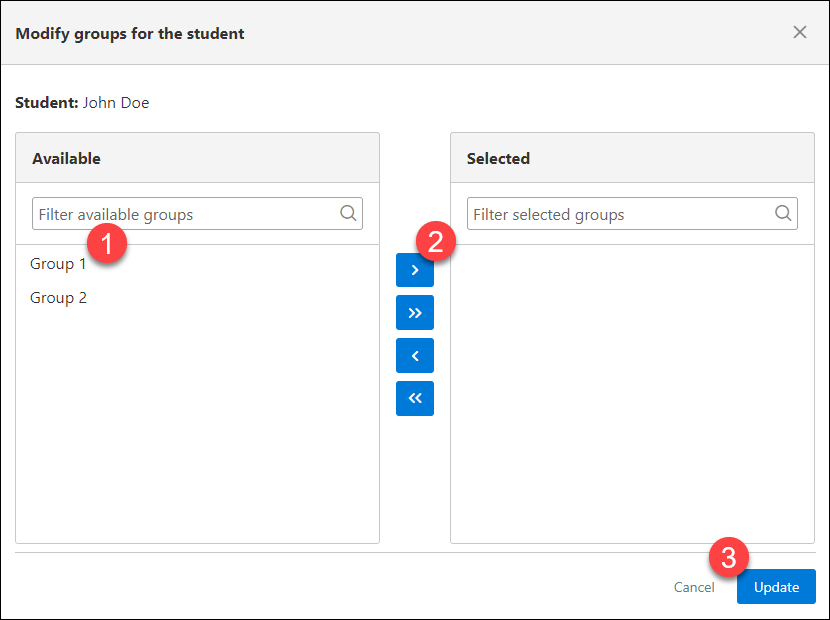
Click on the Modify Groups button. Move the desired group from the Available list to the Selected one.
Create and publish the test #
Now you have all the necessary information to create the test itself.
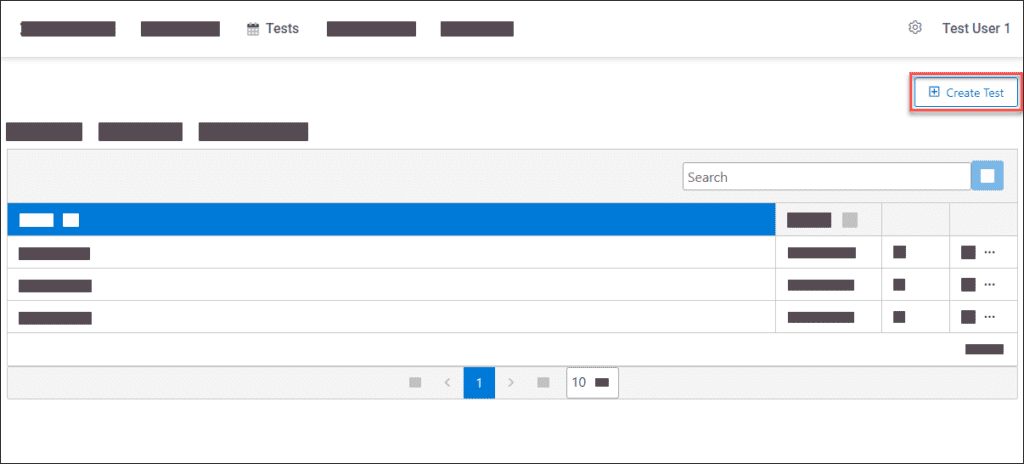
Click on the Tests. It is located on the main menu.
Then, click on the Create Test button.
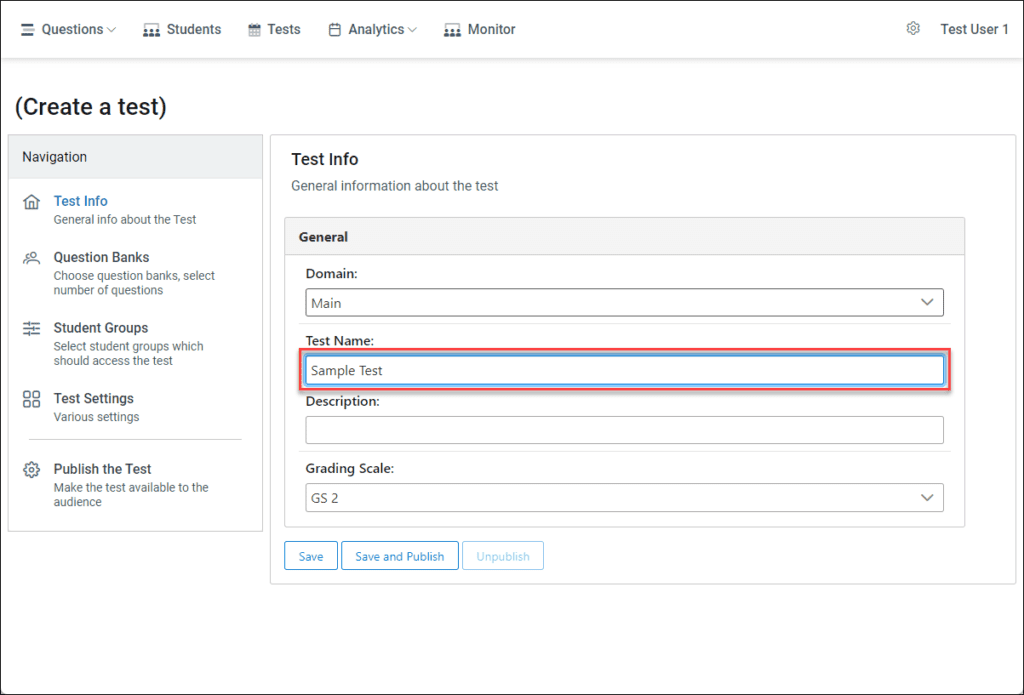
Start filling up the information. Each category contains mandatory and optional settings.
Test Info #
Set the test name in the category Test Info.
Question Banks #
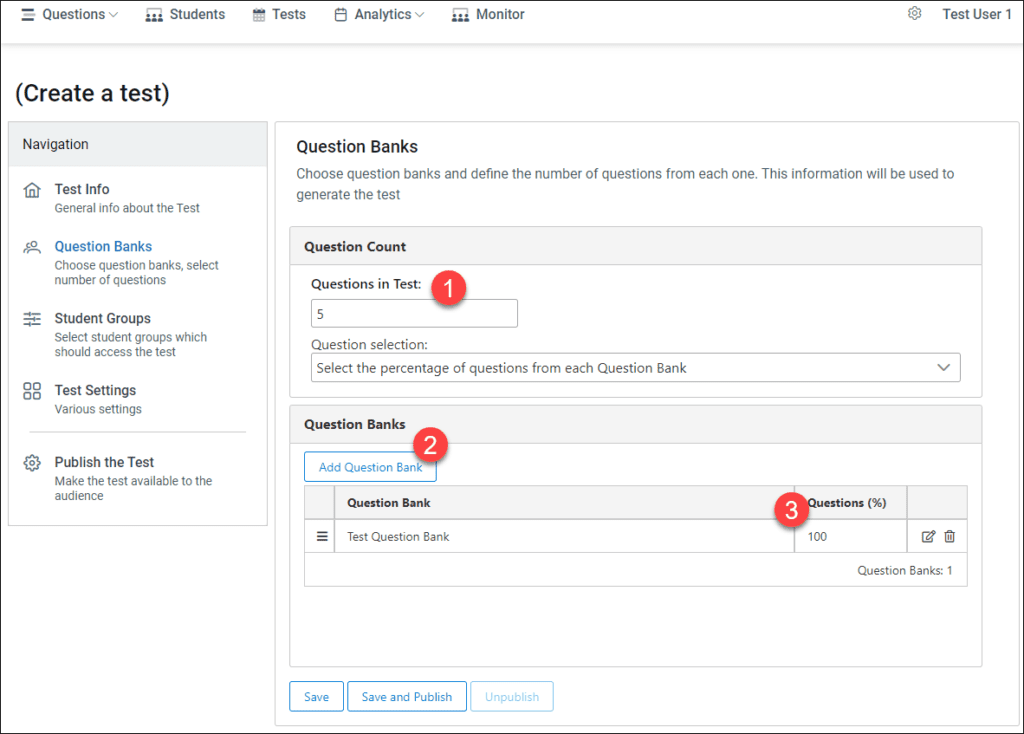
Now, you are going to choose desired question banks in the category Question Banks. ExamJet will generate the test questions based on that data.
- Set the total number of questions generated test should contain. This is the number how many questions should the student see (1)
- Press the Add Question Bank and select previously created one (2). The question bank will appear in the Question Banks list
- Now, based on the Question Selection option, which is located on the same page, you should select the number of the question you need to get from that question bank
- Let’s say, you have added only one question bank, ExamJet should get questions only from that one
- Select the question bank and press the edit icon, then type “100” and press the save button
Now, ExamJet will generate the test questions based on that question bank only.
Student Groups #
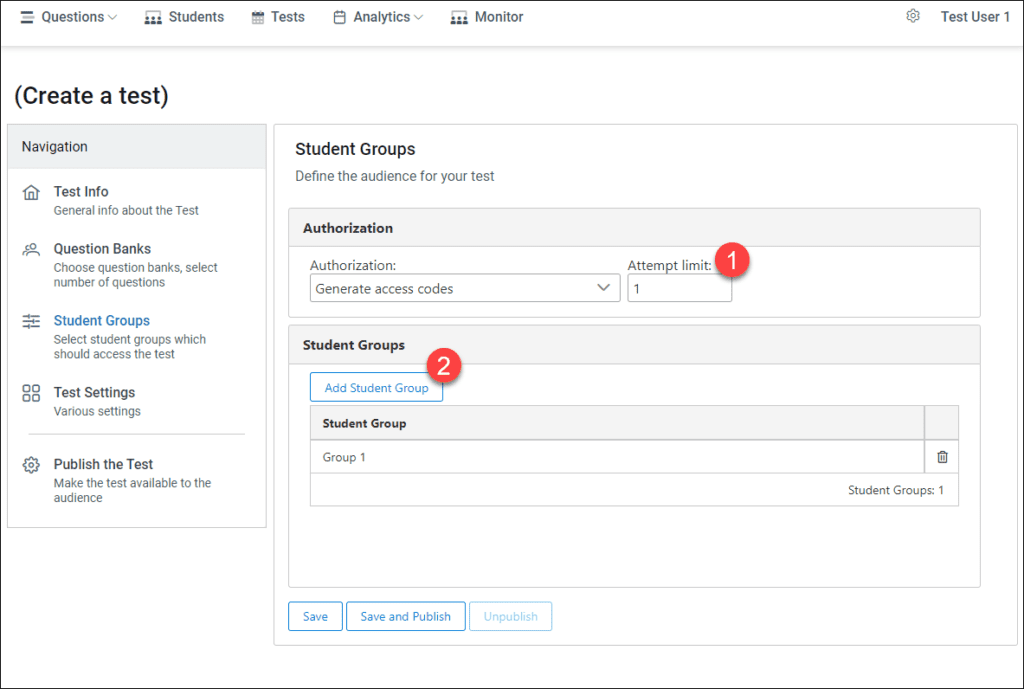
The Student Groups category is the place where you choose student groups who should take the test.
There is the field – Attempt Limit (1), which defines how many times the student can take that exam.
To select student groups – click the Add Student Group button and select the previously created one (2).
Publish the Test #
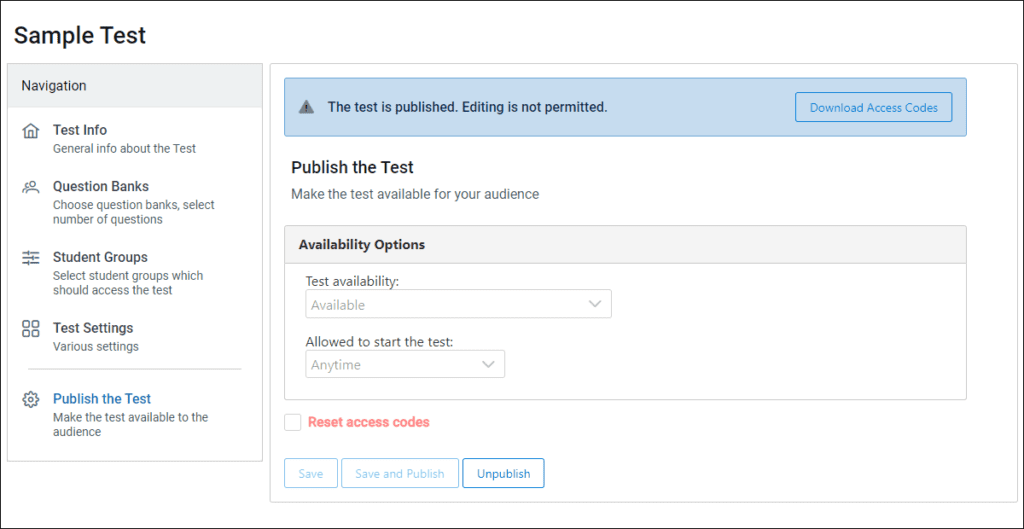
Publishing the test means making it available to the public.
When publishing, ExamJet will generate the test based on the provided information.
The test will contain questions that are available in question banks during publishing. So, if you modify question bank data (add or edit questions in it) it will not affect the test itself.

After you publish the test, you will see the option to provide access codes to students.
Consider access codes as one-time passwords, which are valid for that test only.
That’s it. Now students can take the test.
Tester #
Open Tester and try to start the test using one of the pre-generated access codes.


